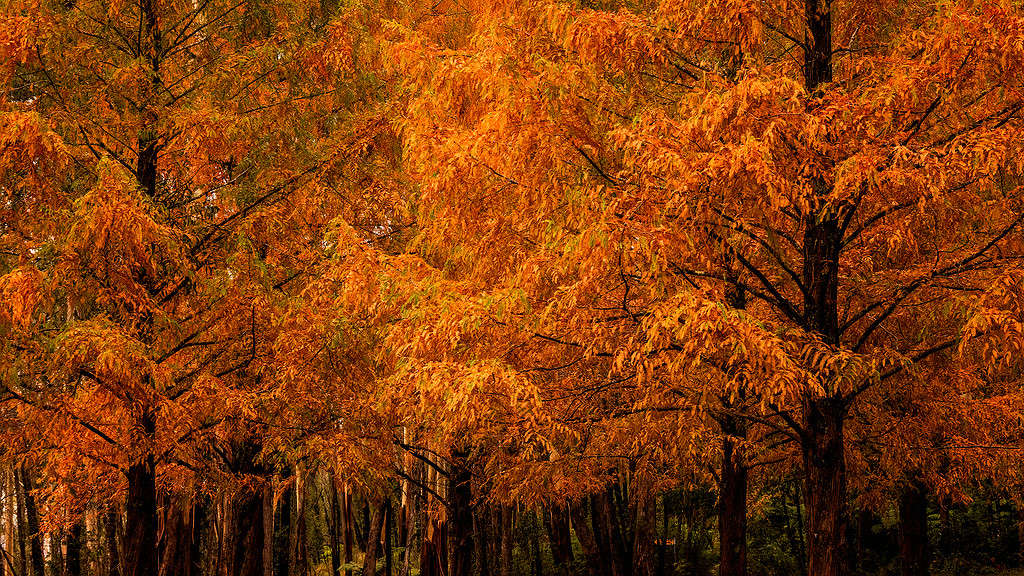
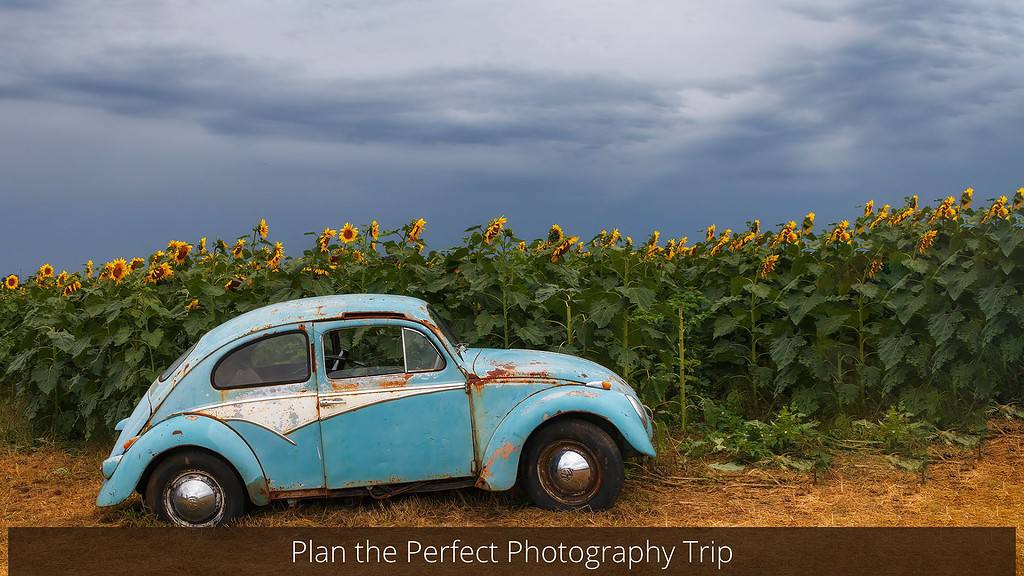
How To Photograph Autumn Colours: 7 Simple Beginner Tips
Trying to figure out how to photograph autumn colours and make them look as amazing as they do in real life?
It’s not always easy.
When you’re out there trying to capture the beauty of autumn, finding the perfect spot and making the colours pop in your photos can be tough.
Sometimes, what you see doesn’t match what your camera captures, leaving the pictures looking a bit dull.
I’ve been there, feeling let down by my early attempts. But, I’ve learned a lot since then and I’m excited to share those tips with you.
This article is all about helping you take vibrant, beautiful autumn photos that you’ll be super proud to share.
We’ll go over how to pick the best times and places for your photoshoots, and I’ll share some tricks to make those autumn colours really stand out.
So let’s dive into this article all about how to photograph autumn colours.

Planning Your Autumn Photography Adventure
Autumn might officially be three months long, but when it comes to capturing those stunning autumn colours with your camera, the window of opportunity is much shorter.
Timing is everything.
Even though I’m in Australia, where our climate might not match the dramatic seasonal changes seen in the northern hemisphere, we still have our special spots.
These places light up with incredible traffic light colours – reds, yellows, and greens that can take your breath away.
But these moments are brief, making planning your photography outings essential.
Google and Google Earth
Start with Google and Google Earth to scout locations.
These tools are fantastic for getting a bird’s-eye view of potential photography spots. You can look for parks, forests, and natural areas that are known for their autumn foliage.
Google Earth, in particular, can give you a realistic preview of the terrain, helping you to visualise the best angles and compositions before you even leave home.
Instagram is not just for sharing your photos; it’s also a goldmine for discovering photography locations.
Use hashtags related to autumn colours and your area (or where you plan to travel) to find spots other photographers have captured.
Pay attention to captions for hints on where and when the photos were taken.
Weather Apps
Keeping an eye on the weather is crucial for autumn photography.
Sudden changes can affect the lighting and mood of your photos, not to mention the practicality of shooting outdoors.
Use weather apps to plan your outings, aiming for days that complement the kind of shots you want, whether that’s sunny days for bright, vibrant photos or overcast conditions for more saturated colours.
Contact Local Information Centres
Don’t underestimate the value of local knowledge.
Contacting local information centres can provide you with up-to-date details on the state of the foliage in various locations.
They might even share some hidden gems that aren’t widely known on social media or online.
Reach Out to Other Photographers
Finally, connecting with other photographers can be incredibly helpful.
Whether it’s through social media, photography clubs, or forums, getting in touch with others who share your passion can offer insights and tips on where to find the best autumn colours.
By combining these resources and reaching out to the community, you’re setting yourself up for a successful autumn photography session.
Remember, the beauty of autumn is fleeting, so planning is key to making the most of this picturesque season.
Autumn is a second spring when every leaf is a flower
~ Albert Camus (French Philosopher)
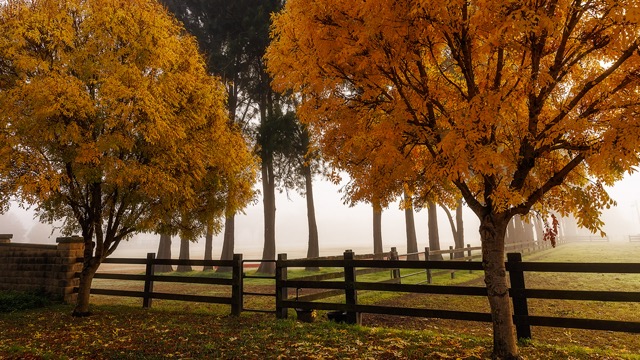
Timing: Finding the Right Light for Autumn Photos
When you’re aiming to capture the rich colours of autumn, knowing the best time of day to take your photos is key.
The soft light early in the morning or late in the day can really make the autumn colours shine.
This kind of light is often called the golden hour, and it’s perfect for photography.
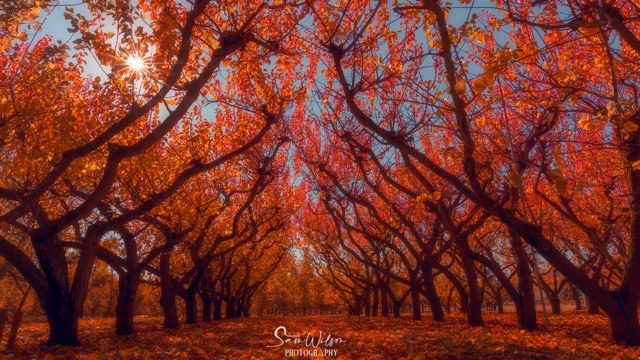
Golden Hour Glow
The golden hour happens just after sunrise and just before sunset.
The sun is low in the sky, giving off a soft, warm light. This light is great for autumn photos because it makes the colours look deeper and more vibrant.
The reds, oranges, and yellows of the leaves can look even more stunning under this light.
During autumn, the sun’s angle is just right for extending the golden hour, giving you more time to capture those perfect shots.
This light doesn’t just brighten the scene; it adds warmth and depth, making your photos look more inviting.
Using Shaded Areas
If you can’t make it during the golden hour, don’t worry.
You can still get great photos in the middle of the day, especially if it’s a bit cloudy or if you find a nicely shaded area.
Shade can help soften the light, which is really helpful for bringing out the true colours of the leaves without the harsh shadows or overly bright spots you might get in direct sunlight.
Gear: Essentials for Autumn Photography
When planning your autumn photography outings, the gear you bring along is crucial for capturing those stunning seasonal colours.
You don’t need the most expensive equipment to take great autumn photos, but a good basic kit really will take you a long way.
Tripod: Stability for Every Shot
A sturdy tripod is one of the most important pieces of equipment for autumn photography. It’s essential for trying out different photography techniques, like long exposures, which can make your autumn scenes look even more magical.
Long exposures are great for capturing smooth, flowing water in streams or the gentle movement of leaves in a breeze, adding a dynamic element to your photos.
Filters: Enhancing Autumn’s Palette
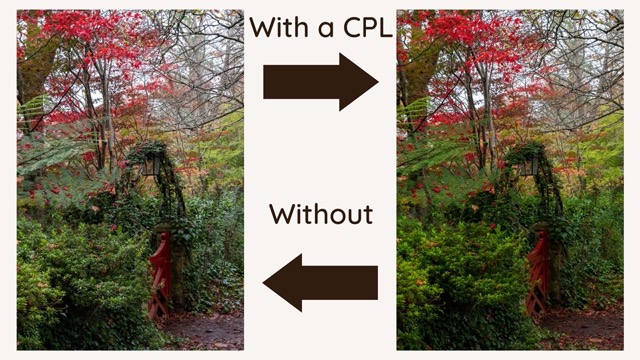
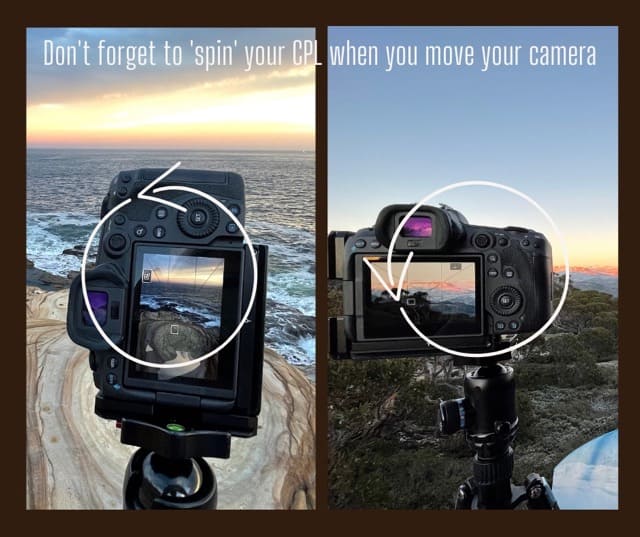
Filters can play a big role in autumn photography, especially if you’re shooting scenes with water. A Circular Polarising Filter (CPL) is particularly useful during this season. It helps make the autumn colours pop by reducing glare and reflections.
This is especially noticeable on sunny days or in bright conditions where the sun can cause shiny surfaces to reflect light, making it hard to see the true colours of your scene.
A CPL can reduce the glare on leaves, making their colours more vibrant and details more defined.
Plus, if you’re photographing landscapes with the sky in the frame, a CPL filter can deepen the blue of the sky, making any clouds stand out and adding contrast and depth to your photos.
To achieve a smooth, mirror-like surface on the water, consider using a Neutral Density (ND) Filter.
This filter allows for longer exposures without overexposing your photo, smoothing out any ripples or movements in the water.
Protective Gear: Keeping Your Equipment Safe
Autumn weather can be unpredictable, with sudden rain storms as the colder season approaches.
Protecting your gear is essential, so having some kind of rain cover for your camera and lenses is a good idea.
Make sure you know how weather-proof your camera is before heading out.
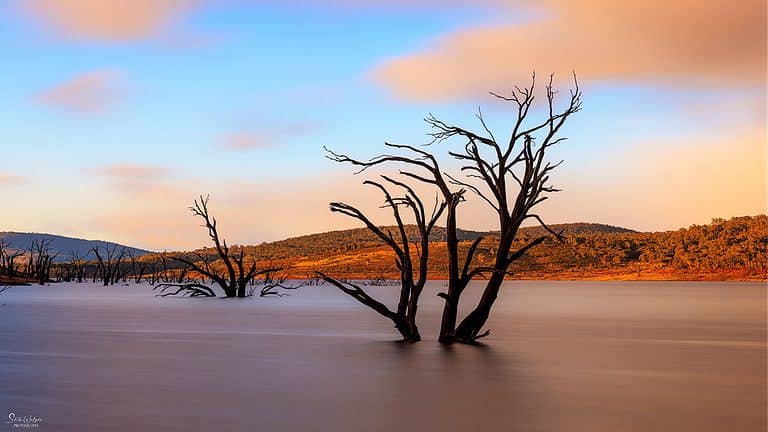
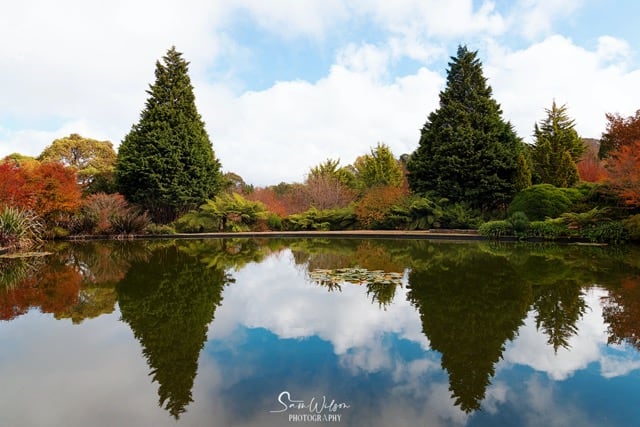
Reflections: Capturing Autumn in Water
Autumn brings out some of the best colours nature has to offer, and one way to make those colours even more special in your photos is by using reflections. Water can act like a mirror, doubling the beauty of those red, orange, and yellow leaves.
When to Find the Best Reflections
The best reflections usually happen when the water is calm. Early morning or late in the day are perfect times because the light is softer and the water is less likely to be disturbed by wind. This calmness makes the water a perfect mirror for the vibrant autumn colours.
Don’t Overlook Puddles
You don’t always need a lake or river for reflections. After a rain, puddles can be perfect for capturing the fall colours reflected in them. Even a small puddle can hold a piece of the sky or the fiery colours of the trees above, adding an interesting twist to your photos.
I would be remiss not to mention composition here. As with all photography, composition is a crucial element in photographing the beautiful colours of autumn. Here’s some great simple guides to get you started:
Weather: Embracing Autumn’s Mood
Autumn weather can be unpredictable, which is both a blessing and a curse, so don’t put your camera away.
In fact, some of the most unique and beautiful autumn photos come from days when the weather is less than perfect.
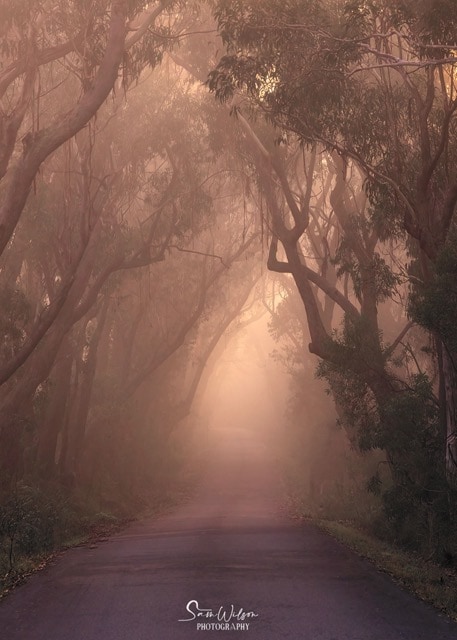
Fog and Mist
Fog and mist are common in autumn and can add a mysterious touch to your photos.
They soften the landscape and can make a familiar scene look completely different, full of mystery and charm.
When you see fog or mist, it’s a great time to capture the quiet and serene side of autumn.
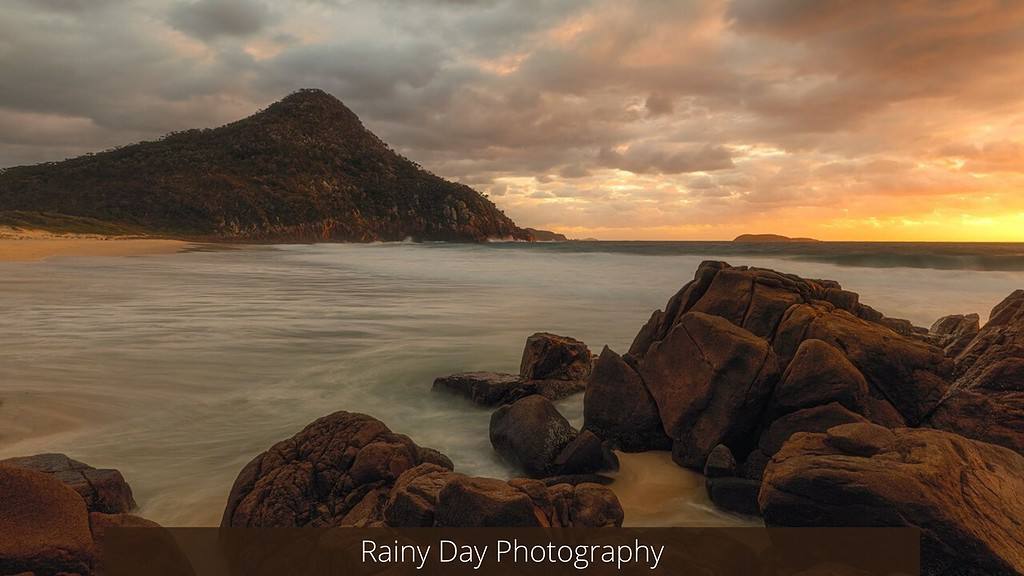
Rainy Days
Don’t be quick to dismiss rainy days. Rain can enhance the colours of autumn, making them appear more vibrant.
Everything gets a nice sheen when it’s wet, which can make your photos pop with colour.
Overcast Conditions
Overcast days are perfect for photographing fall colours.
While you might think cloudy skies could make your photos look dull, it’s actually the opposite in autumn.
The clouds act like a giant softbox, spreading the light evenly and reducing harsh shadows.
This means the colours of the leaves will look richer and more saturated. Just try to keep the grey, colourless sky out of your frame to focus on the beauty of the foliage.
Windy Conditions
When your main subjects are leaves, wind can be challenging.
It’s best to shoot on days with little to no wind, but if you do find yourself out on a windy day, keep an eye on your shutter speed. A faster shutter speed can help freeze the motion of the leaves, capturing them clearly despite the movement.
Autumn’s unpredictable weather can actually provide you with unique opportunities for photography.
Whether it’s the softness of an overcast day or the mystery of a foggy morning, these conditions can help you capture the true essence of fall.
So next time the weather seems iffy, grab your camera and see what beautiful moments you can find.
When it comes to taking photos of fall foliage, the approach isn’t much different from other types of landscape photography.
However, a few key settings can help you get those vibrant autumn colours just right.
Understanding the Exposure Triangle
The exposure triangle – the elements of shutter speed, aperture, and ISO – is crucial in photography. Here’s a brief rundown:
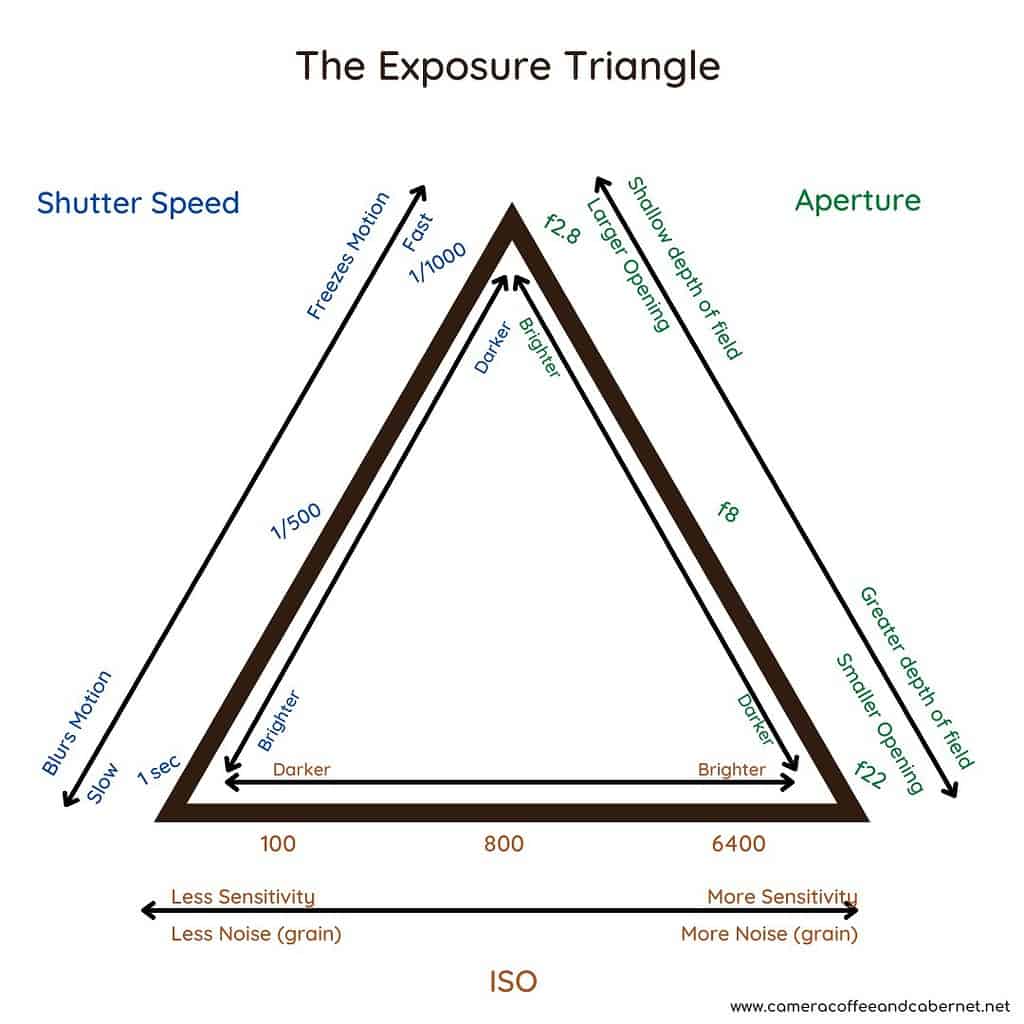
Shutter Speed: Determines how long your camera’s sensor is exposed to light. A faster shutter speed is great for freezing motion, like leaves rustling in the wind. A slower shutter speed can blur motion, like flowing water in a stream.
Aperture: Controls how much light enters through the lens by adjusting the size of the lens opening. A wider aperture (a lower f-number) lets in more light and blurs the background, focusing attention on a specific subject. A narrower aperture (a higher f-number) keeps more of the scene in focus.
ISO: Adjusts the camera sensor’s sensitivity to light. A lower ISO is used in bright conditions to reduce graininess, while a higher ISO is helpful in lower light.
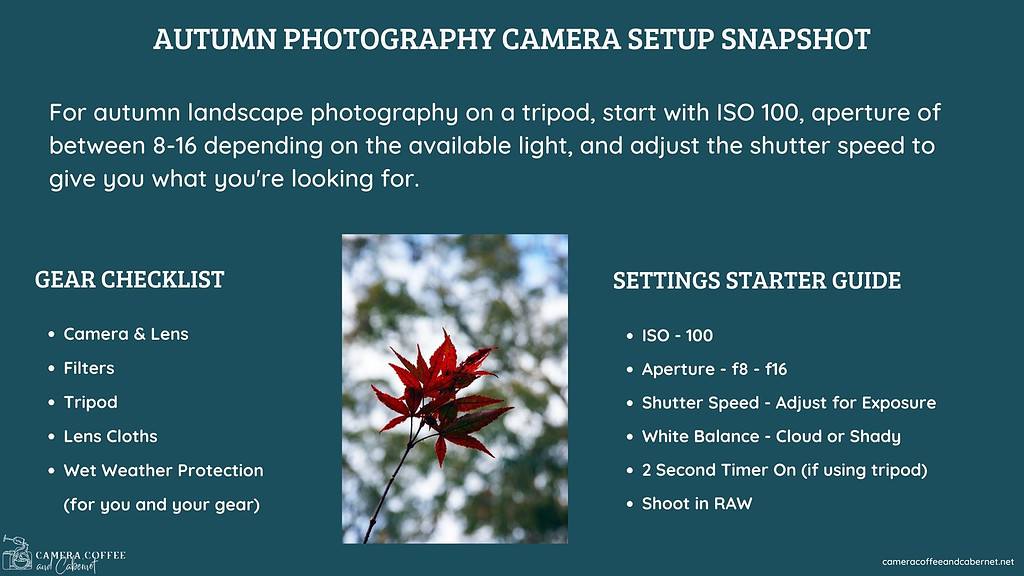
White Balance and Format
If you’ve been disappointed even with the ‘correct exposure, here are a couple of adjustments that can really make a big difference:
White Balance: To capture the warm tones of autumn, set your camera’s white balance to “Shade” or “Cloudy.”
These settings add a warm touch that complements the natural colours of fall foliage.
RAW vs. JPEG: Shooting in RAW format allows you more flexibility during post processing, giving you more data to enhance the photo’s colours and details.
If you prefer not to edit your photos, shooting in JPEG is fine, but consider adjusting your camera’s contrast and saturation settings to boost the colours right when you take the picture.
To achieve deeper colours, more contrast, and a more dramatic effect, underexpose the image slightly – just make sure you don’t clip the shadows.
This will mean you can easily give the colours a pop in your post processing without affecting the quality of the image.
And don’t forget that Circular Polarising Filter!
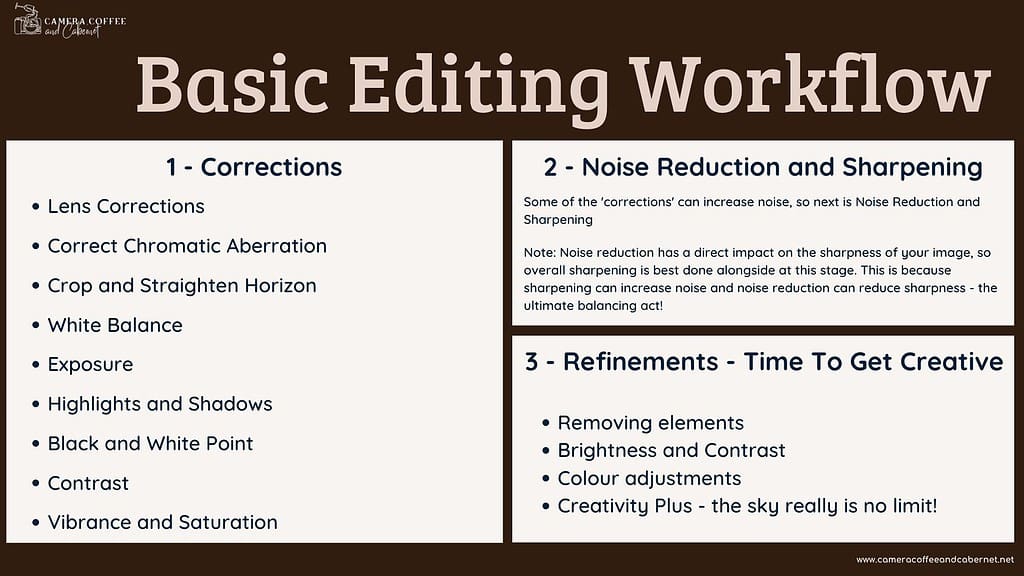
Post Processing Tips for Enhancing Autumn Colours
After you’ve captured the beautiful scenes of autumn with your camera, post processing can help you make those colours really stand out.
Having a regular post processing workflow will also help to streamline this.
Here’s some simple adjustments for your fall colour images to make them shine.
Starting with Basic Exposure Edits
Start by tweaking the exposure settings.
Adjust the highlights and shadows just a bit to ensure they’re not lost or too intense. This helps keep all the details in your photo.
Then, if necessary, adjust the overall exposure to get the lighting just right.
Colour Adjustments: Vibrance vs. Saturation
When it comes to autumn colours, nature gives you a fantastic starting point.
Your main goal in post-processing is to enhance those colours without making them look unnatural. Here’s where understanding the difference between vibrance and saturation becomes crucial:
Vibrance increases the intensity of the more muted colours in your photo without affecting the already vibrant colours too much. It’s a subtle way to boost the overall colorfulness of your image.
Saturation increases the intensity of all colours in your image equally. It can quickly make your photo look overdone if you’re not careful.
For fall foliage images, you might start by slightly increasing the vibrance to enhance the natural colours without making them too intense.
Be cautious with saturation; a little goes a long way.
Take a Break, Then Review
It’s easy to get carried away with adjustments and end up with a photo that looks too processed.
A good tip is to step away from your work for a bit.
When you come back with fresh eyes, you might notice that you need to dial back some of your edits.
This happens to everyone and was a valuable lesson I learned.
Let it marinate, even if it’s just for an hour or two – have a coffee break, and come back and see if you need to make any further changes before sharing with the world.
Wrapping Up: Your Guide to Autumn Photography
Last but not least, enjoy this special season.
Take the time at your locations to really enjoy the atmosphere – this can not only soothe the soul, but you may also hone in and see the smaller details around you, and not just focus on the bigger scenes.

Capturing autumn’s colours is all about using the right approach and a bit of know-how.
We’ve gone through everything from picking the best times to shoot, to setting up your camera, and even how to tweak your photos afterward to make those fall colours pop.
Remember, the season’s beauty is here for a short time, so use these tips to make the most of it.
Keep exploring and taking beautiful photos. There’s always something new to learn in photography, and each season brings its own special moments to capture.
That’s it for now – Keep clicking and sipping 📷 ☕ 🍷
Like this post? PIN it so you can save it for later

Other Helpful Articles:
- Landscape Photography Guide for Beginners
- Landscape Photography Terms: The Ultimate List For Beginners
- Understanding The Exposure Triangle: Complete Guide For Beginners
- Improve Your Landscape Photography Composition
- Essential Landscape Photography Gear
- Landscape Photography Accessories Every Photographer Should Have
- 7 Important Things That Nobody Tells You About Photography