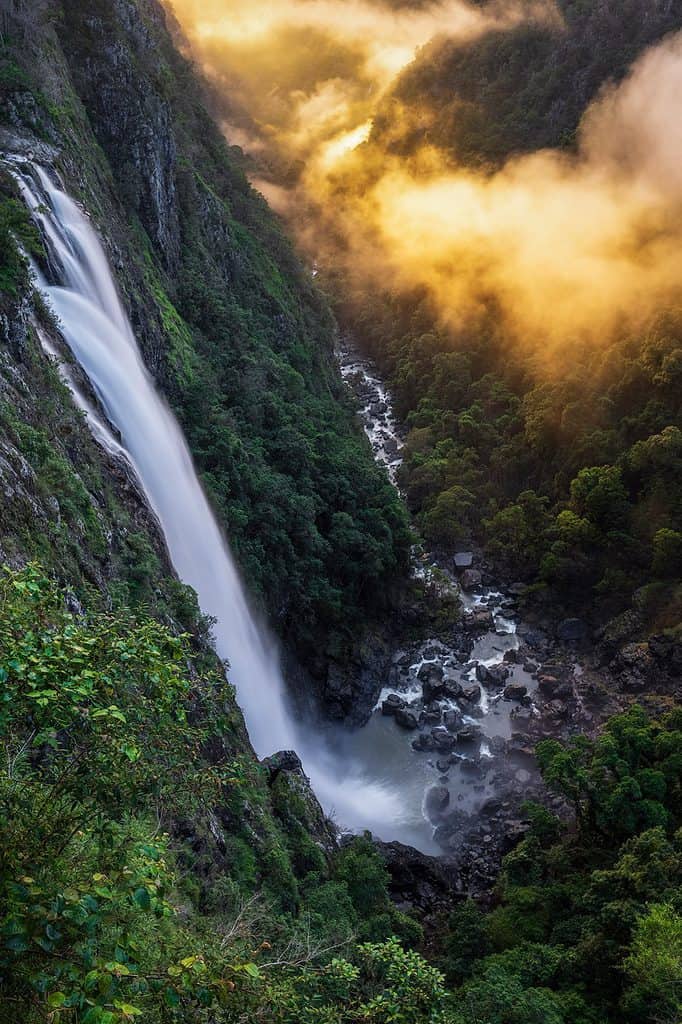
Waterfall Photography: Tips For New Photographers
Start capturing those stunning, silky-smooth waterfall photos
When I first started photography, I really wanted to learn how to take great photos of waterfalls. You know, that silky smooth water flow. But I soon found out that it’s not as easy as it looks.
A quick google search told me that I needed a slow shutter speed, so off I went to my local waterfall with my camera and tripod. At least I realised I needed a tripod to keep my camera steady.
I fully expected to return home with amazing photos. Boy was I disappointed.
There was a lot more learning to do, but I can now confidently say that I’m able to take waterfall photos that are sharp, in focus, AND with that lovely smooth, silky water flow.
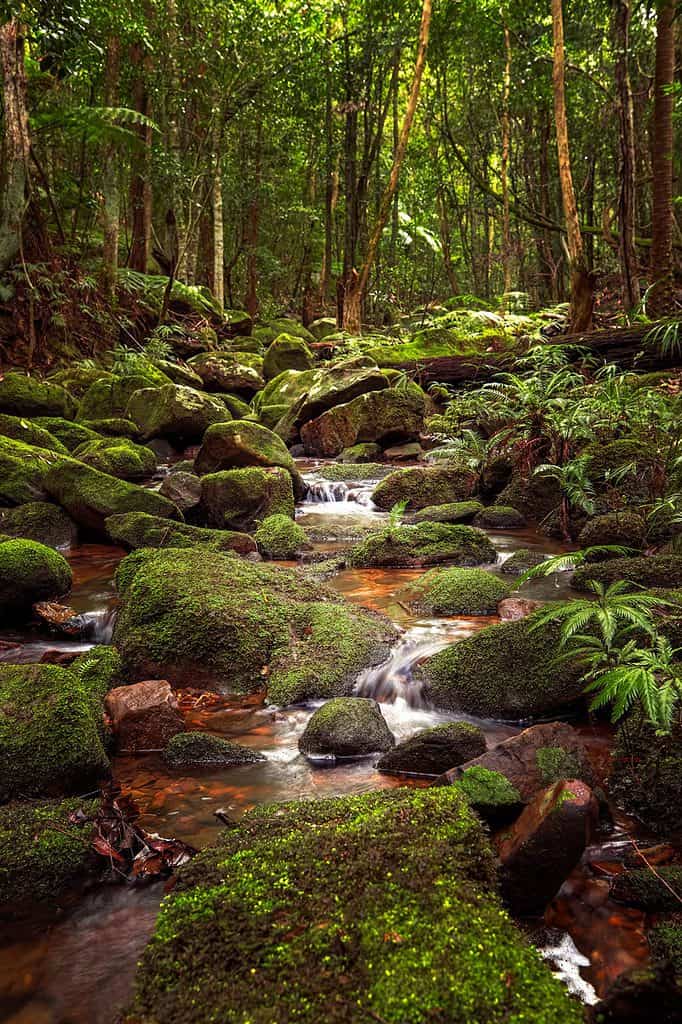
Photographing waterfalls and streams can be a bit tricky, but don’t worry, this guide will help with that. I’m including streams in this article as the situation is the same; moving water in an otherwise stationary scene.
“There’s no better place to find yourself than sitting by a waterfall and listening to its music.”
~ Roland R. Kemler
In this guide, I’ll share everything you need to know to take beautiful waterfall photos. From essential gear to camera settings to composition, it’s all covered. So let’s get started and capture some amazing waterfall shots!

When And Where To Go
Apart from sunrise and sunset, the best time to photograph waterfalls is on a cloudy day, and just after rain if possible.
Some waterfalls will have a decent flow year round, but many will need to be visited within a few days of rainfall. This is where research comes in so you time it right.
At the other end of the scale, make sure there hasn’t been too much rain in the area so you can actually get to your location. This happened to me trying to visit a waterfall a few hours away.
We didn’t do our research, so ended up driving 700 km in a day only to not be able to get to the waterfall due to road closures.
Do try to go when the light is favourable if at all possible. Early morning or late afternoon when there is no direct sunlight is ideal. The same goes for a cloudy, overcast day. This provides softer light that will enable you to take a longer exposure. This lets you capture that lovely silky smooth water without having an overexposed sky.
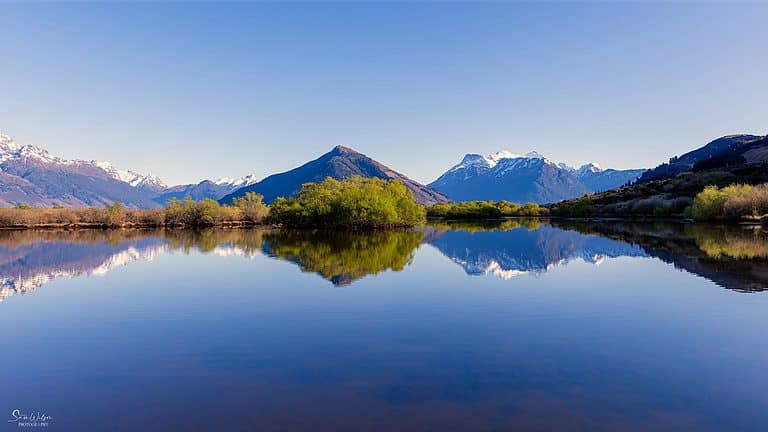
If you’re looking for some inspiration on finding waterfalls and streams to photograph, check out this article: How to Find Locations.
Essential Gear For Waterfall Photography
Now that you know when and where you are going, it’s time to get your gear together.
Here is what I take when I head out to photograph waterfalls and streams.
- Camera and Lenses
- Tripod
- L-Bracket
- Filters
- Cleaning Cloths
- Rain Cover
This list is basically the same as what I would take on every landscape photography shoot that I do.
Check out this guide on Essential Landscape Photography Gear.

Camera and Lenses
When you’re taking pictures of waterfalls and streams, it’s important to have a camera that lets you adjust the ISO, aperture, and shutter speed because the water is moving.
When it comes to lenses, I suggest using a wide angle lens (around 16mm) to get the whole waterfall in the shot. My personal favourite is the 24-70mm lens, which allows me to zoom in and get up close and personal with the waterfall.
And, if you want to highlight certain parts of the waterfall, a telephoto lens (like 70-200mm or longer) will help you zoom in and focus on specific areas.
Tripod
When taking pictures of waterfalls and streams, you often need a slow shutter speed, which means you can’t hold the camera steady by hand and expect a sharp shot.
Even though some cameras have good image stabilisation, it’s still best to use a tripod for most long-exposure photography. It’s a must-have!
TIP: If your lens has image stabilisation, make sure to turn it off when you’re using a tripod. If you don’t, the camera will try to fix the shake that isn’t there and it can make your photos come out less sharp.
L-Bracket
While it’s not a must-have, an L-Bracket is a great gadget that makes it super easy to switch between taking photos in portrait or landscape mode.
Tripods are primarily designed for photos to be taken in landscape orientation which can make it tricky to shoot vertical or portrait perspectives which I often like to do.
This is where an L-Bracket comes in. It’s a plate that connects to your camera where your tripod would normally go and it easily enables you to change your orientation.
You can easily switch from portrait to landscape orientation without moving or adjusting the tripod position itself – winning!
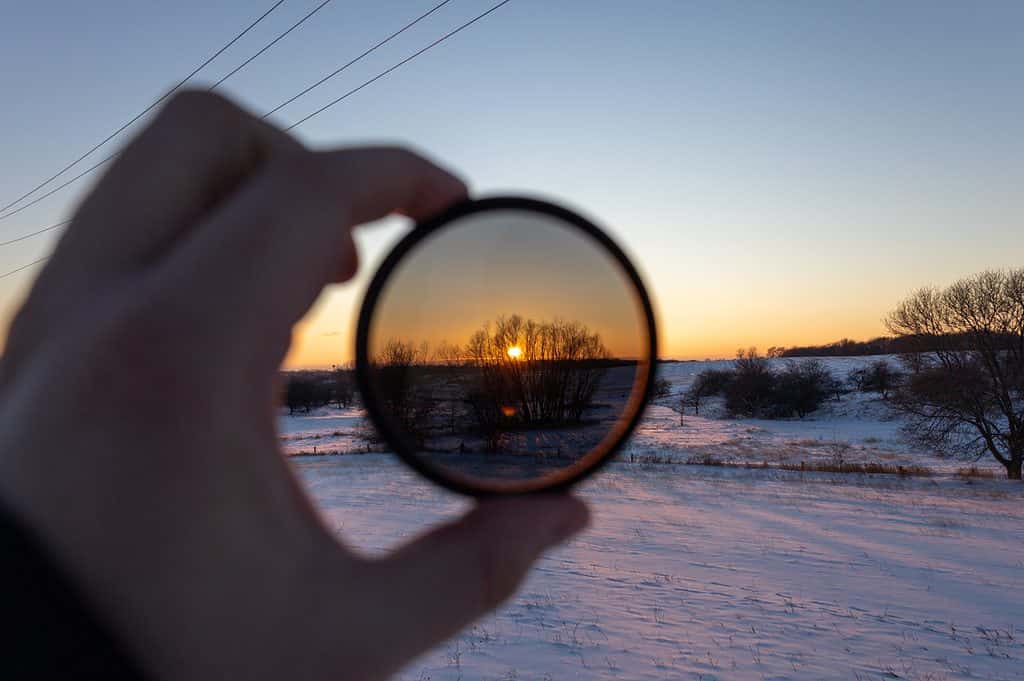
Filters
When I’m taking photos of waterfalls, I always use a set of filters that have a Circular Polariser and Neutral Density filters. They’re both super helpful, but if I had to pick just one, I’d say the Circular Polariser is the most essential.
A Circular Polarising Filter is like a pair of sunglasses for your camera. It helps to reduce glare from reflective surfaces like water and makes the colours in foliage look more vibrant. It also allows you to use a longer shutter speed to create a smooth and milky effect in the water.
For a more comprehensive guide on Circular Polarising Filters, check out this article I wrote: Why and how to use a Circular Polarising Filter.
Neutral Density Filters are also very helpful when it comes to photographing waterfalls. These filters help to reduce the amount of light that enters your camera, allowing you to use a longer shutter speed. This is particularly useful when trying to capture the motion and flow of the water in a waterfall, creating a smooth and silky effect without overexposing the brighter areas.
Neutral Density Filters come in different strengths measured in stops of light.
The one I use most frequently is a 6-stop, but I also have a 3 and 10-stop filter in my kit that I use occasionally.
Cleaning cloths
No matter how careful you are, your lens will get dirty and/or wet – so be prepared.
This is why carrying a simple cleaning kit is an essential part of your landscape photography gear.
A few simple cleaning cloths can prevent your photos being ruined – keep one in your pocket so you never get caught out!
Rain Covers
While most cameras these days are weather sealed, I do prefer to use a camera cover just to be extra safe.
There are many different covers available, ranging from simple plastic covers to high-end covers made for specific camera models.
Depending on your usage, if you’re looking for something simple to keep in your bag, a plastic bag can suffice. Just cut a hole in the end and secure it with elastic bands and you are good to go.
Check out this article on photography in the rain for a more comprehensive list if you think you might get wet.
Don’t forget to bring water and snacks when you’re heading out to photograph waterfalls. Just reaching the waterfall often involves some time and effort, so make sure to take a break and enjoy the view once you finally arrive. And even though the water might look tempting, it’s not always safe to drink, so it’s best to bring your own. Trust me, you’ll be glad you did.
And don’t forget to take a moment to just soak in the beauty of the scene, it’s the perfect opportunity to recharge and enjoy the moment.
It’s also a great opportunity to give you time to look around and start thinking about your composition …
Composition
Composition is crucial when it comes to taking great photos, and that includes photographing waterfalls and streams.
Don’t just settle for the first shot you see, take your time to explore the area, you never know what kind of awesome angles and compositions you might discover. Trust me, it’s worth the effort.
When it comes to taking photos of waterfalls, there are a few things to keep in mind when it comes to composition. You might have heard of things like the “rule of thirds” but I’m not going to get into all that here.
Instead, let me give you some practical tips to consider when you’re out there trying to get that perfect shot.
Give your photo space. What I mean by this, is don’t zoom in or compose too tight around the waterfall/flow. This will help give a sense of scale to your image, and you can always crop in a little once you get home, but you can’t add space around later.
Think about your orientation.
As a general guideline, if it is a really tall waterfall, it’s probably best to shoot in portrait or vertical orientation.
Alternatively, if it is a wider tiered waterfall consider landscape or horizontal orientation.
Look for leading lines, or interesting subjects for your foreground. Is there any natural framing say with trees surrounding the waterfall, or rocks in the foreground leading you to the flow? Safety first of course as you don’t want to go slipping unnecessarily on any rocks.
Consider whether or not you want to include any sky. If there are clouds around, try and wait until they are covering your scene to avoid the background being too bright. If it is too bright, consider not including it in your composition for a more pleasing image.
TIP – imagine describing what it is you like about the scene to someone who can’t see it. Then, try as best you can to fit these things into your image. If the sky has no detail or is super bright, you probably wouldn’t even mention it. Therefore there is no reason it needs to be included.
So, don’t rush, take your time, and have fun experimenting with different perspectives, you might be surprised at the results.
Camera Settings
Alright, you’ve made it to the waterfall, you’ve scouted around, and you know what you want to shoot. Now it’s time to get your camera ready and start taking some photos.
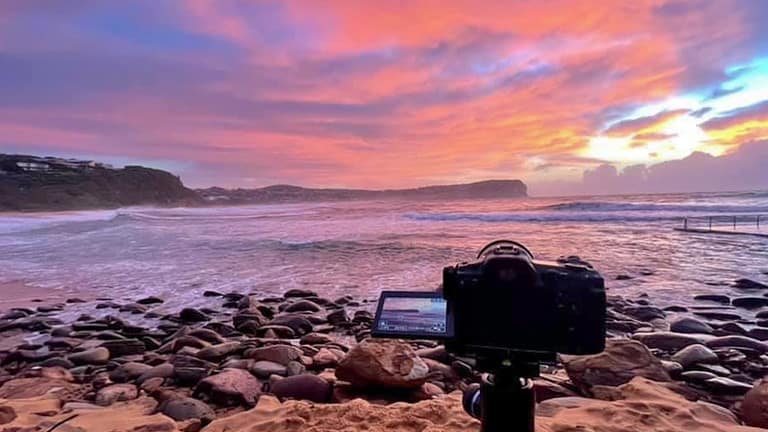
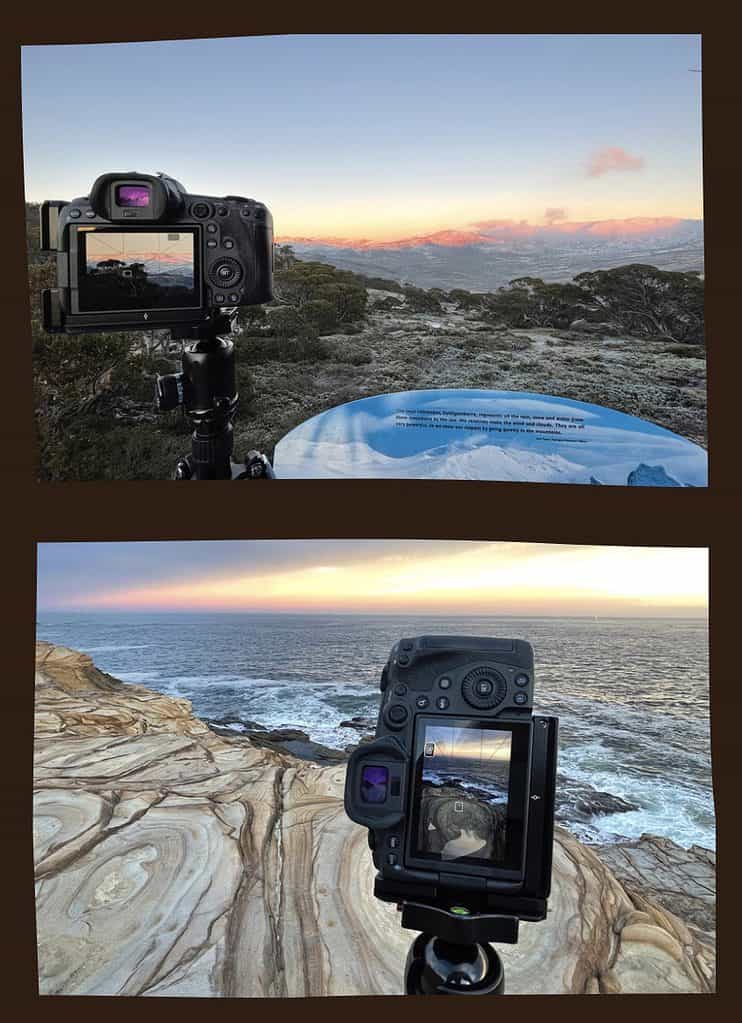
First things first, get your tripod set up and make sure your camera is level. It’s important to double and triple check that your tripod is stable before you let go of your camera.
Trust me, you don’t want your camera and tripod falling over on rocks or into the water. Be extra careful, and take the time to set up your gear properly. It will save you a lot of headache in the long run.
Focus
When you’re taking pictures of waterfalls, you’ll want most of your image to be in focus, from the rocks in the foreground to the trees in the background. This will mostly depend on your aperture setting, which we’ll talk about later.
But for now, let’s talk about where to focus.
The easiest way is to pick something one-third of the way into your frame and use autofocus to lock it in. This way, you’ll be sure to get a nice, sharp shot with plenty of depth.
When you are ready to expand on this, Photography Life has this great article – How To Focus In Landscape Photography.
Reminder: Turn off your image stabilisation on your lens if you have it.
Camera Mode
Shooting in manual mode might seem a bit intimidating, but it gives you full control over your exposure.
When taking photos of waterfalls, it’s important to be in control in order to achieve the desired flow of water. It’s also the perfect setting for you to learn the basics of exposure.
There’s usually no rush, so you can take your time. You can take lots of shots and experiment until you get comfortable with how ISO, aperture and shutter speed all work together to create the perfect exposure.
Set your camera to a 2-second timer on the shutter. Most cameras have this feature so research this before heading out. If not you can use a remote (more information on this below). This is to prevent any movement when you press the shutter so you get the sharpest image possible.
Focus mode should be set on one-shot auto focus. This is the setting where you select a single focus point (about one-third in on your scene). Apart from the water the scene here is still, so this setting along with the aperture you will choose below will ensure that everything around your water will be sharp and in focus.
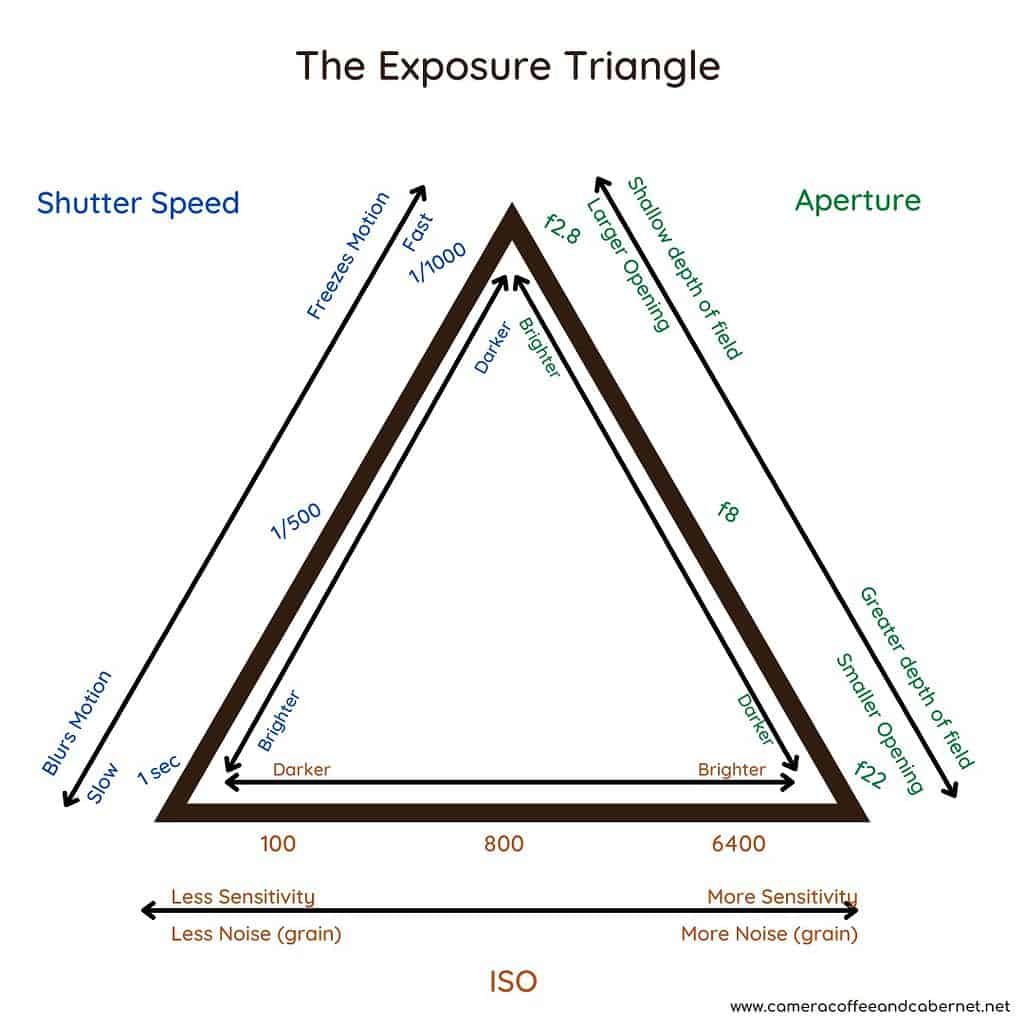
Next is creating the correct exposure balance. Exposure basically comes down to three settings – ISO, aperture and shutter speed. These three elements work together – change one and you have to change one or both other elements. See below for more on this.
To get you started, here’s a rundown on the basics:
ISO
Set your ISO to the lowest number possible, normally around 100. The lower your ISO, the longer shutter speed you will be able to achieve, and the less grain or noise in your image.
Aperture
Next is your aperture. Anywhere between 8 and 16 should give you a sharp image from front to back. My go to is usually f11 but this can be increased or decreased to help give you the shutter speed that you want.
Shutter Speed
Once you have your ISO and aperture set, it is the shutter speed that will control the flow of water in your image. I generally try to go between 0.5 and 2 seconds. This will depend on the overall amount of light in the area you are shooting as well as the speed the water is flowing.
Take The Shot & Review
Take a test shot and if it is too dark (under-exposed) you can either make your shutter speed longer (closer to 2 seconds), OR lower your aperture number (closer to f8).
Do the opposite If your image is too light (over-exposed). Make your shutter speed shorter (closer to 0.5 seconds), or raise your aperture number (closer to f16).
Take your shot and check your camera’s screen and make any necessary adjustments.
Now, your camera’s screen can give you an indication, it’s not always accurate. This can be because the screen itself is backlit. This means that it can look brighter than it really is, particularly in low light.
This is where your histogram comes in.
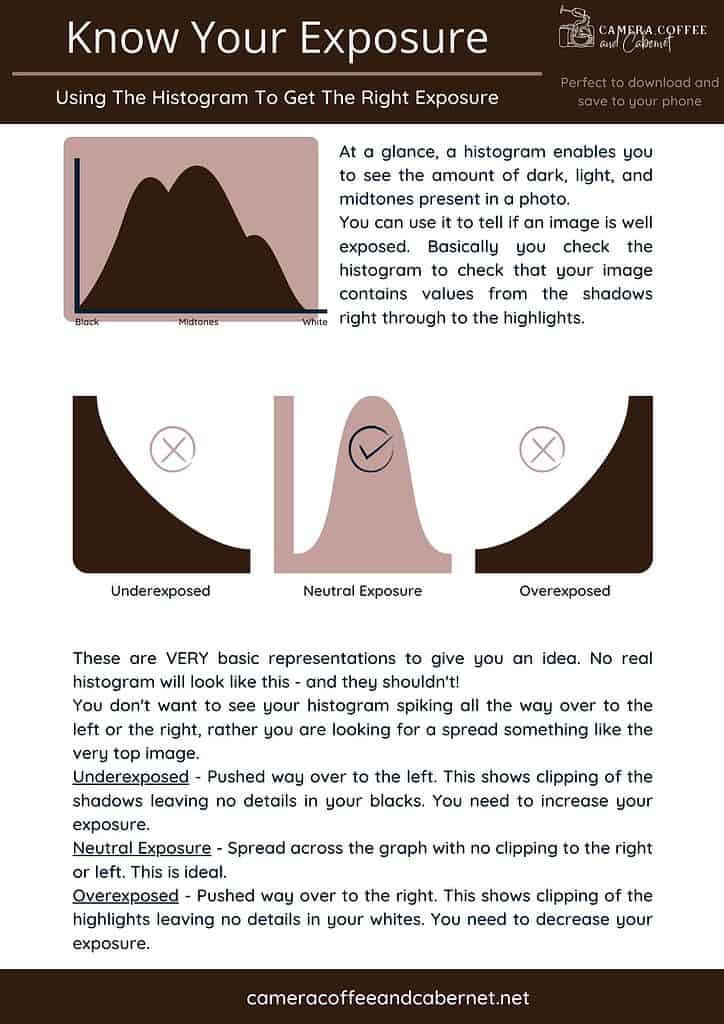
For more in depth information on your histogram, check out this article: Landscape Photography Guide.
TIP – the faster you make your shutter speed, the more you will ‘freeze’ the water, and if you go slower you will lose more and more detail until your water can look more like milk. This is a very personal choice. It’s hard to really see just on the back of your camera, so take more photos than you think you need and review them properly when you get them up on the computer at home.
Exposure Blending
It may not be possible to get the correct exposure in one image. The simplest way around this is to take two separate images. One is exposed for the darker areas, and the other for the brighter ones. These two images can then be blended in an editing program such as Photoshop or Lightroom.
While this is not a particularly difficult technique to get started with, it is beyond the scope of this landscape photography guide. This video is a great start.
Take Lots Of Photos
Take lots of pictures of the same scene at different shutter speeds, at least 10. This way you’ll have a better chance of getting a shot you like. Also, don’t be afraid to experiment with a fast shutter speed to freeze the water and show off the power of the waterfall.
I always take more photos than I think I want at ANY location as I assume it’s the last time I will ever be there (you never know) to avoid being disappointed later.
And that’s it, you’ve hopefully got a tonne of photos on your memory card and you’ve learnt a lot in the process, but there’s one more really important aspect to going out and photographing waterfalls …
It’s not ALL about the photos. Make sure you put the camera aside for a while and just enjoy the beautiful piece of nature that you are surrounded by.
After The Shoot
Once you get home, it’s time to upload your images and see what magic you’ve created.
But don’t forget some basic maintenance for your gear first:
Clean Your Gear
Clean your camera and lenses as you go to keep as much water off as possible, and clean thoroughly when you get home.
This includes your tripod! Even if it’s a waterproof one, you need to give it a good clean to remove any water and dirt. The easiest way I have found is to extend it fully outside and give it a good hose. Let it dry while it’s still extended before putting it away ready for your next outing.
When travelling and may not have access to a hose, I’ve often used the shower in my accommodation for this. It works a treat!
Post-Shoot Workflow
Establishing a simple post-shoot workflow will ensure your photos are organised, backed up safely and ready to share at any time.
The basic steps to this workflow are:
- Transferring your images from camera to computer
- Importing your images
- Organising and sorting
- Processing
- Backing up
- Printing or publishing your images online
For a complete guide check out this article – Developing A Photography Workflow.
I truly hope that this article has helped you get excited and feel confident about getting out and photographing those waterfalls and streams. If I had to choose, I would say that these are my favourite things to photograph and I’m really excited to share all that I have learned with you.
So, get out there, get wet (but keep your gear safe lol) and shoot some fabulous waterfall photos!
That’s it for now – Keep clicking and stay caffeinated
I truly hope you’ve enjoyed this article! If you’ve found it helpful (or if you have any questions), I’d love to hear from you in the comments down below.
Like this post? PIN it so you can save it for later.
If you’re looking for more inspiration, or more details to shoot different situations, then check out these other articles:
- Seascape Photography
- Landscape Photography
- Timing Your Landscape Photography
- Exposure Compensation: How To Use It For Better Landscape Photos
- Landscape Photography In The Rain
- Creating Sunstars In Your Images
- How To Find Photography Locations
Don’t miss a post – sign up Here if you haven’t already
Note – This post may contain affiliate links This means I may receive a commission, at no extra cost to you, if you make a purchase through a link. Please see my full disclosure for further information.
Unless otherwise stated, all photos are mine and remain my copyright images – Sam Wilson Photography.